How To Set an Enrollment Trigger for a Journey
Automatically enroll records in a Journey by setting enrollment triggers. Records are enrolled when they meet specific criteria and/or complete an event.
There are three types of enrollment triggers:
- When an Event Happens: A record will enroll in the Journey when a specific event is completed. For example, when a Lead record has opened an email.
- Based on Criteria: A record will enroll in the Journey when it meets the filter criteria. For example, when Contact Title is Marketing Manager and Location is Indiana, United States
- Based on a Schedule: Enrollment can be scheduled to occur once at a specified date & time, or on a repeating specified date & time. A scheduled enrollment may repeat daily, weekly, monthly, or yearly. For example, when a Contact opens an email then enroll Weekly at 9:30am.
Note: This example uses a Lead-based Journey, and will be updating the Lead record as it automatically moves through the Journey.
How to choose a Trigger:
To automatically enroll a record in a Journey, you must first choose a Trigger:
1. Navigate to a new or existing Journey.

2. Click on the Choose Trigger button to open the list of Triggers. Choose a Trigger from the list.

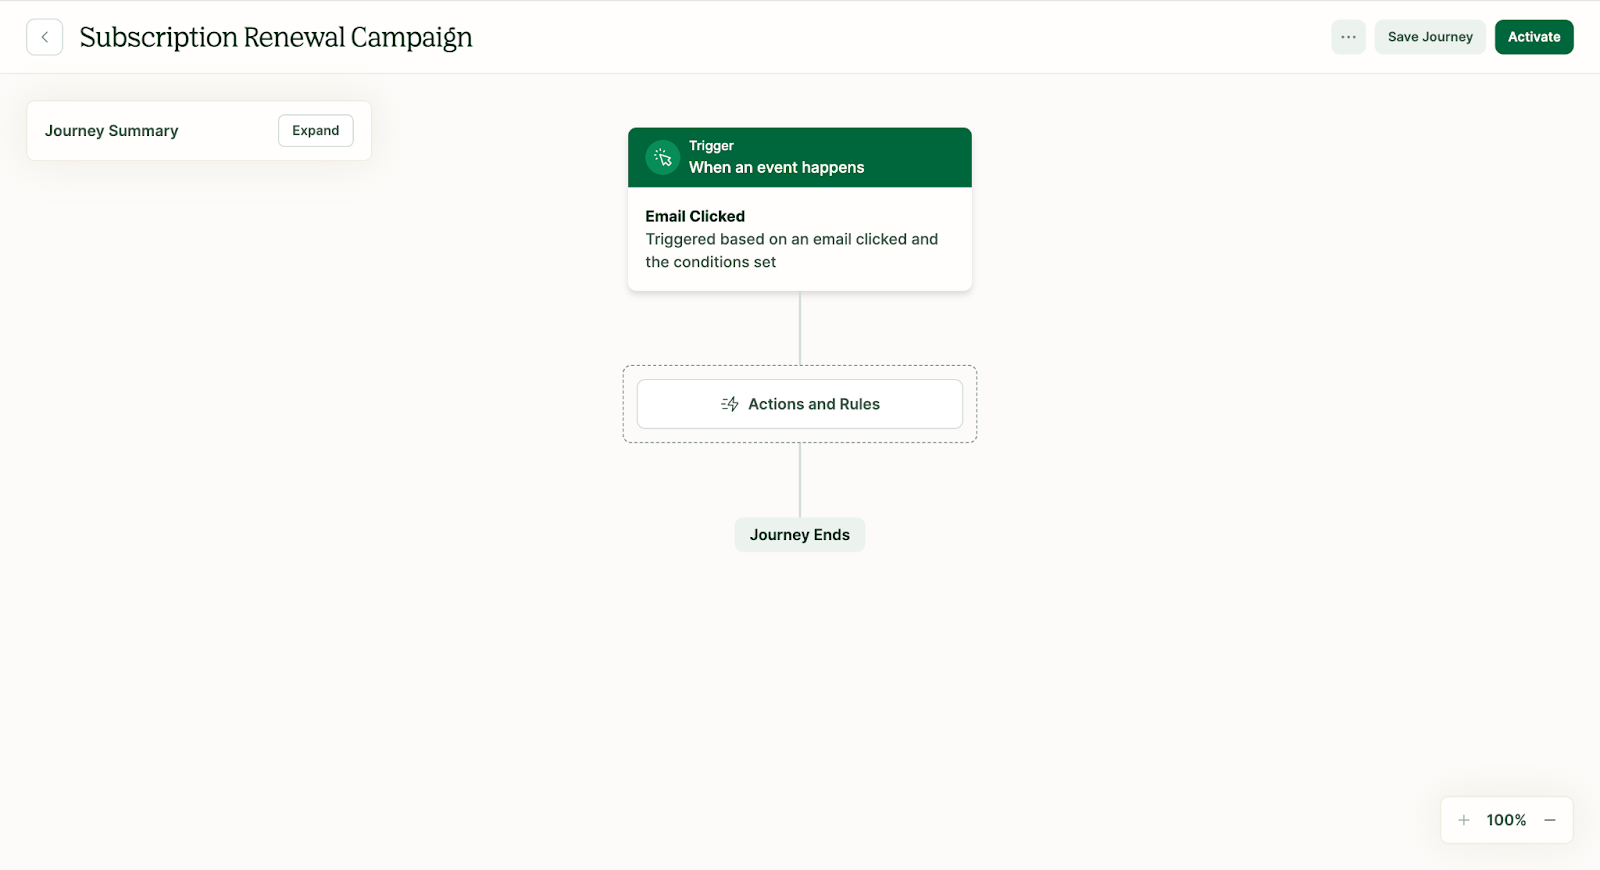
How to set the “When an Event Happens” Trigger
1. Navigate to the Triggers list and click the When an Event Happens option
2. Choose the Event Type that should trigger enrollment. Available event types include:
- When an email is clicked
- When an email is opened
- When an email is delivered
- When an SMS is delivered

3. Once the Event Type is chosen, set the filter to include emails that meet specific criteria. To set the filter criteria:
A. Click the Field dropdown and select the field that should be filtered.

B. Click the Operator dropdown and select one of the available options. Note: these options vary depending on the chosen field.

C. Click the Value field and enter the text string.

4. Click the Save Trigger button. The When an Event Happens trigger card will now appear on the Journey Canvas.
How to set the “Based on Criteria” Trigger
1. Navigate to the Triggers list and click the Based on Criteria option
2. Once the trigger is chosen, set the filter to include Leads that meet specific criteria. To set the filter criteria:
A. Click the Field dropdown and select the field that should be filtered.

B. Click the Operator dropdown and select one of the available options. Note: these options vary depending on the chosen field.

C. Click the Option dropdown and select one of the available options. Note: these options vary depending on the chosen field.

D. Repeat this process to add additional conditions to the filter criteria.
3. Click the Save Trigger button. The When an Event Happens trigger card will now appear on the Journey Canvas.

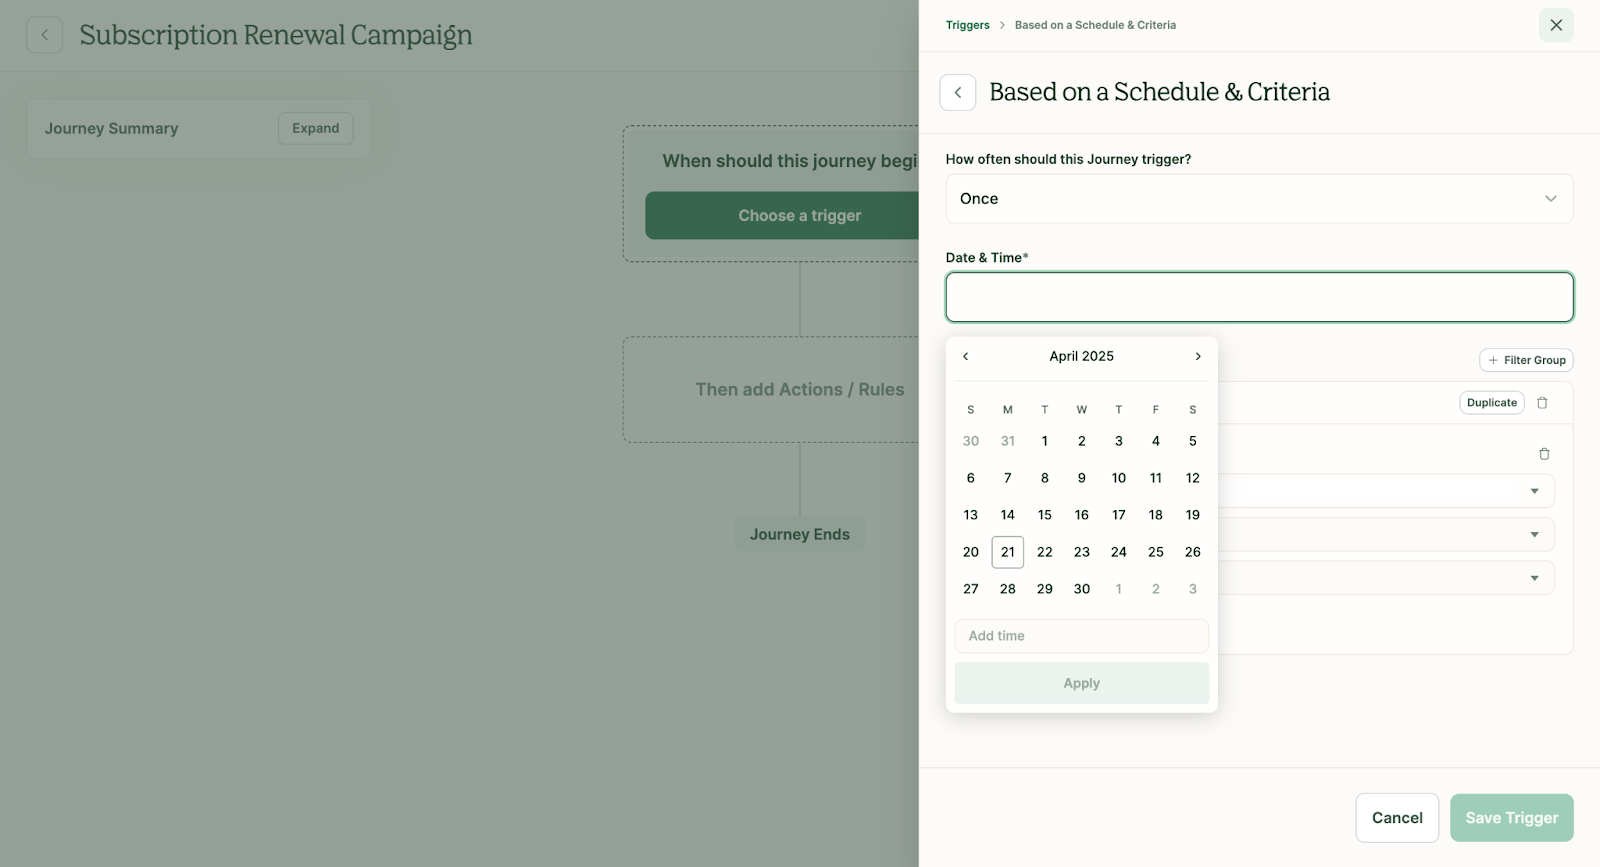
How to set the “Based on a Schedule & Criteria” Trigger
1. Navigate to the Triggers list and click the Based on a Schedule & Criteria option
2. Once the trigger type is chosen, select how often the Journey should trigger.

A. If Once is selected, then select the date and time the Journey should be triggered
B. If Daily is selected, then select the time the Journey should be triggered

C. If Weekly is selected, then select the weekday and time the Journey should be triggered

D. If Monthly is selected, then select the day of the month and time the Journey should be triggered.

E. If Annually is selected, then select the date and time the Journey should be triggered

3. Once the frequency, date, and time are chosen, set the filter to include Leads that meet specific criteria. To set the filter criteria:
A. Click the Field dropdown and select the field that should be filtered.

B. Click the Operator dropdown and select one of the available options. Note: these options vary depending on the chosen field.

C. Click the Option dropdown and select one of the available options. Note: these options vary depending on the chosen field.
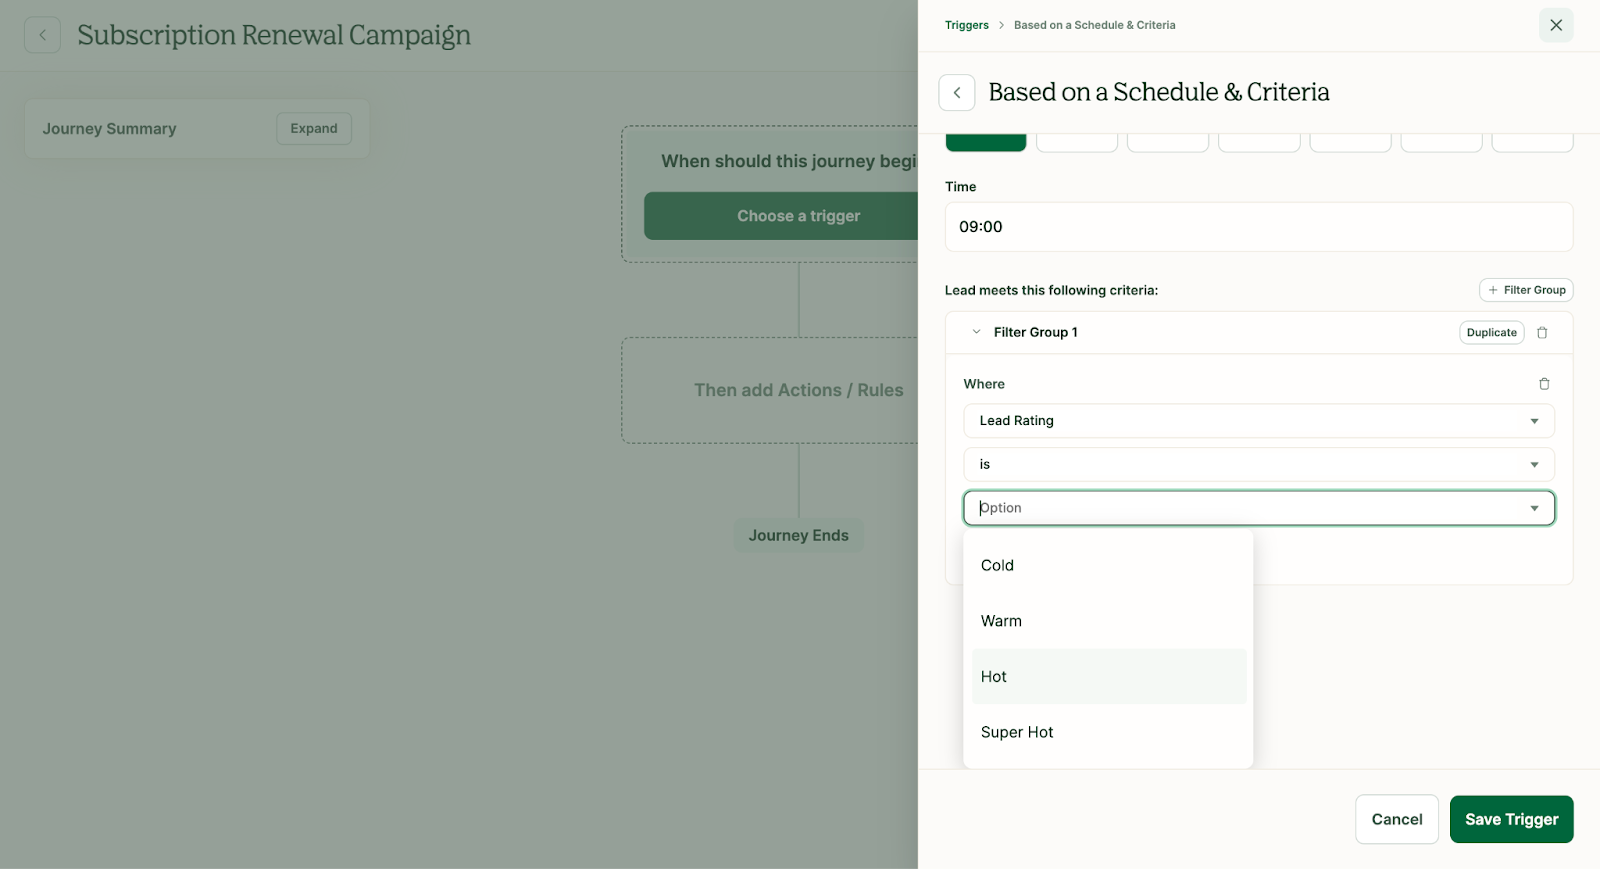
D. Repeat this process to add additional conditions to the filter criteria.
4. Click the Save Trigger button. The When an Event Happens trigger card will now appear on the Journey Canvas.
